Your own SPARCStation 5 workstation, with QEmu and Solaris, PART 2 - Installing Solaris 2.6
Previously in this series
In the previous installment, we downloaded all required software, created a disk image, and prepared the disk. We ended with a reboot, and the emulator should now be showing the OpenBIOS boot prompt again. We are ready to install Solaris.
For our installation, we cannot always use the defaults that the installer presents us. Specifically, we want to do three things differently:
- We want to set up the network using the virtual network system that QEMU provides the emulated machine with. This means that we will give the emulated system a fixed IP address.
- We want to have a larger sizes for /var and /usr than the installer will use by default. So we need to manually layout the file system.
- We don't want to automatically reboot after the installation is done. Because we want to set up a few little extra network options before the reboot.
Starting the installation procedure
After rebooting, the emulator will be in the OpenBIOS boot prompt again. But this time, we will boot normally from the cdrom, instead of booting to single-user mode.
# boot cdrom:d
Booting commences...

And after a while we are treated to the Solaris Welcome screen. And you thought that Apple invented the Welcome screen with a Welcome message in different languages of the world...
(or maybe Apple did, and Sun was the one who copied it from Apple ;))

Configuring the network
We wait a bit, and after another short while the installer will start the first part of the installation: it will ask for all necessary information to join a network.
But it wants to know our language and locale first, and will then give us some general information on setting up the machine.


On the next screen we can enter a hostname for our system. I used "qemu-solaris".

After that, we are asked if our system is connected to the network. We want to use QEMU's built-in virtual network, so we answer 'yes'.

Next screen up, we are asked for an IP address. To make the system participate in the QEMU virtual network, we will choose a fixed IP address of 10.0.2.15.

A summary screen is now shown, giving us a chance to check what we entered and maybe change our minds. We select Continue if all is well.

Now we are asked for a name service. Choose 'Other' in order to use DNS. We will set up the use of DNS later. Note that we won't really make use of DNS in this current setup. But if we want to actually connect the emulator to the real internet later (using a TAP network configuration), it's best to configure it now.

Again a summary screen is shown. We select continue if all is good.

We are now asked if our system is part of a subnet. Choose 'No', we have only one network (the virtual QEMU network) with no subnets.

Next up is the timezone. Choose any method you like to enter the timezone you want, I chose Geographic Region.

Make sure that the time is correct. I found that it did not automatically correct for daylight savings, so my time was 1 hour off.

We are presented with another summary screen and can select continue.

Now some packages will be installed and the network options will be configured, which takes a short while. When this finishes, a new message will be show and we can select continue. Now we are going to configure the harddisk.

Configuring the harddisk
We
do not want to automatically layout the file system, because it wil
leave /usr, /etc and /var with not enough space and we would quickly end up
with a huge harddisk space but no space to install any required software packages. In the next steps, we will partition the harddisk in a much more useful way.
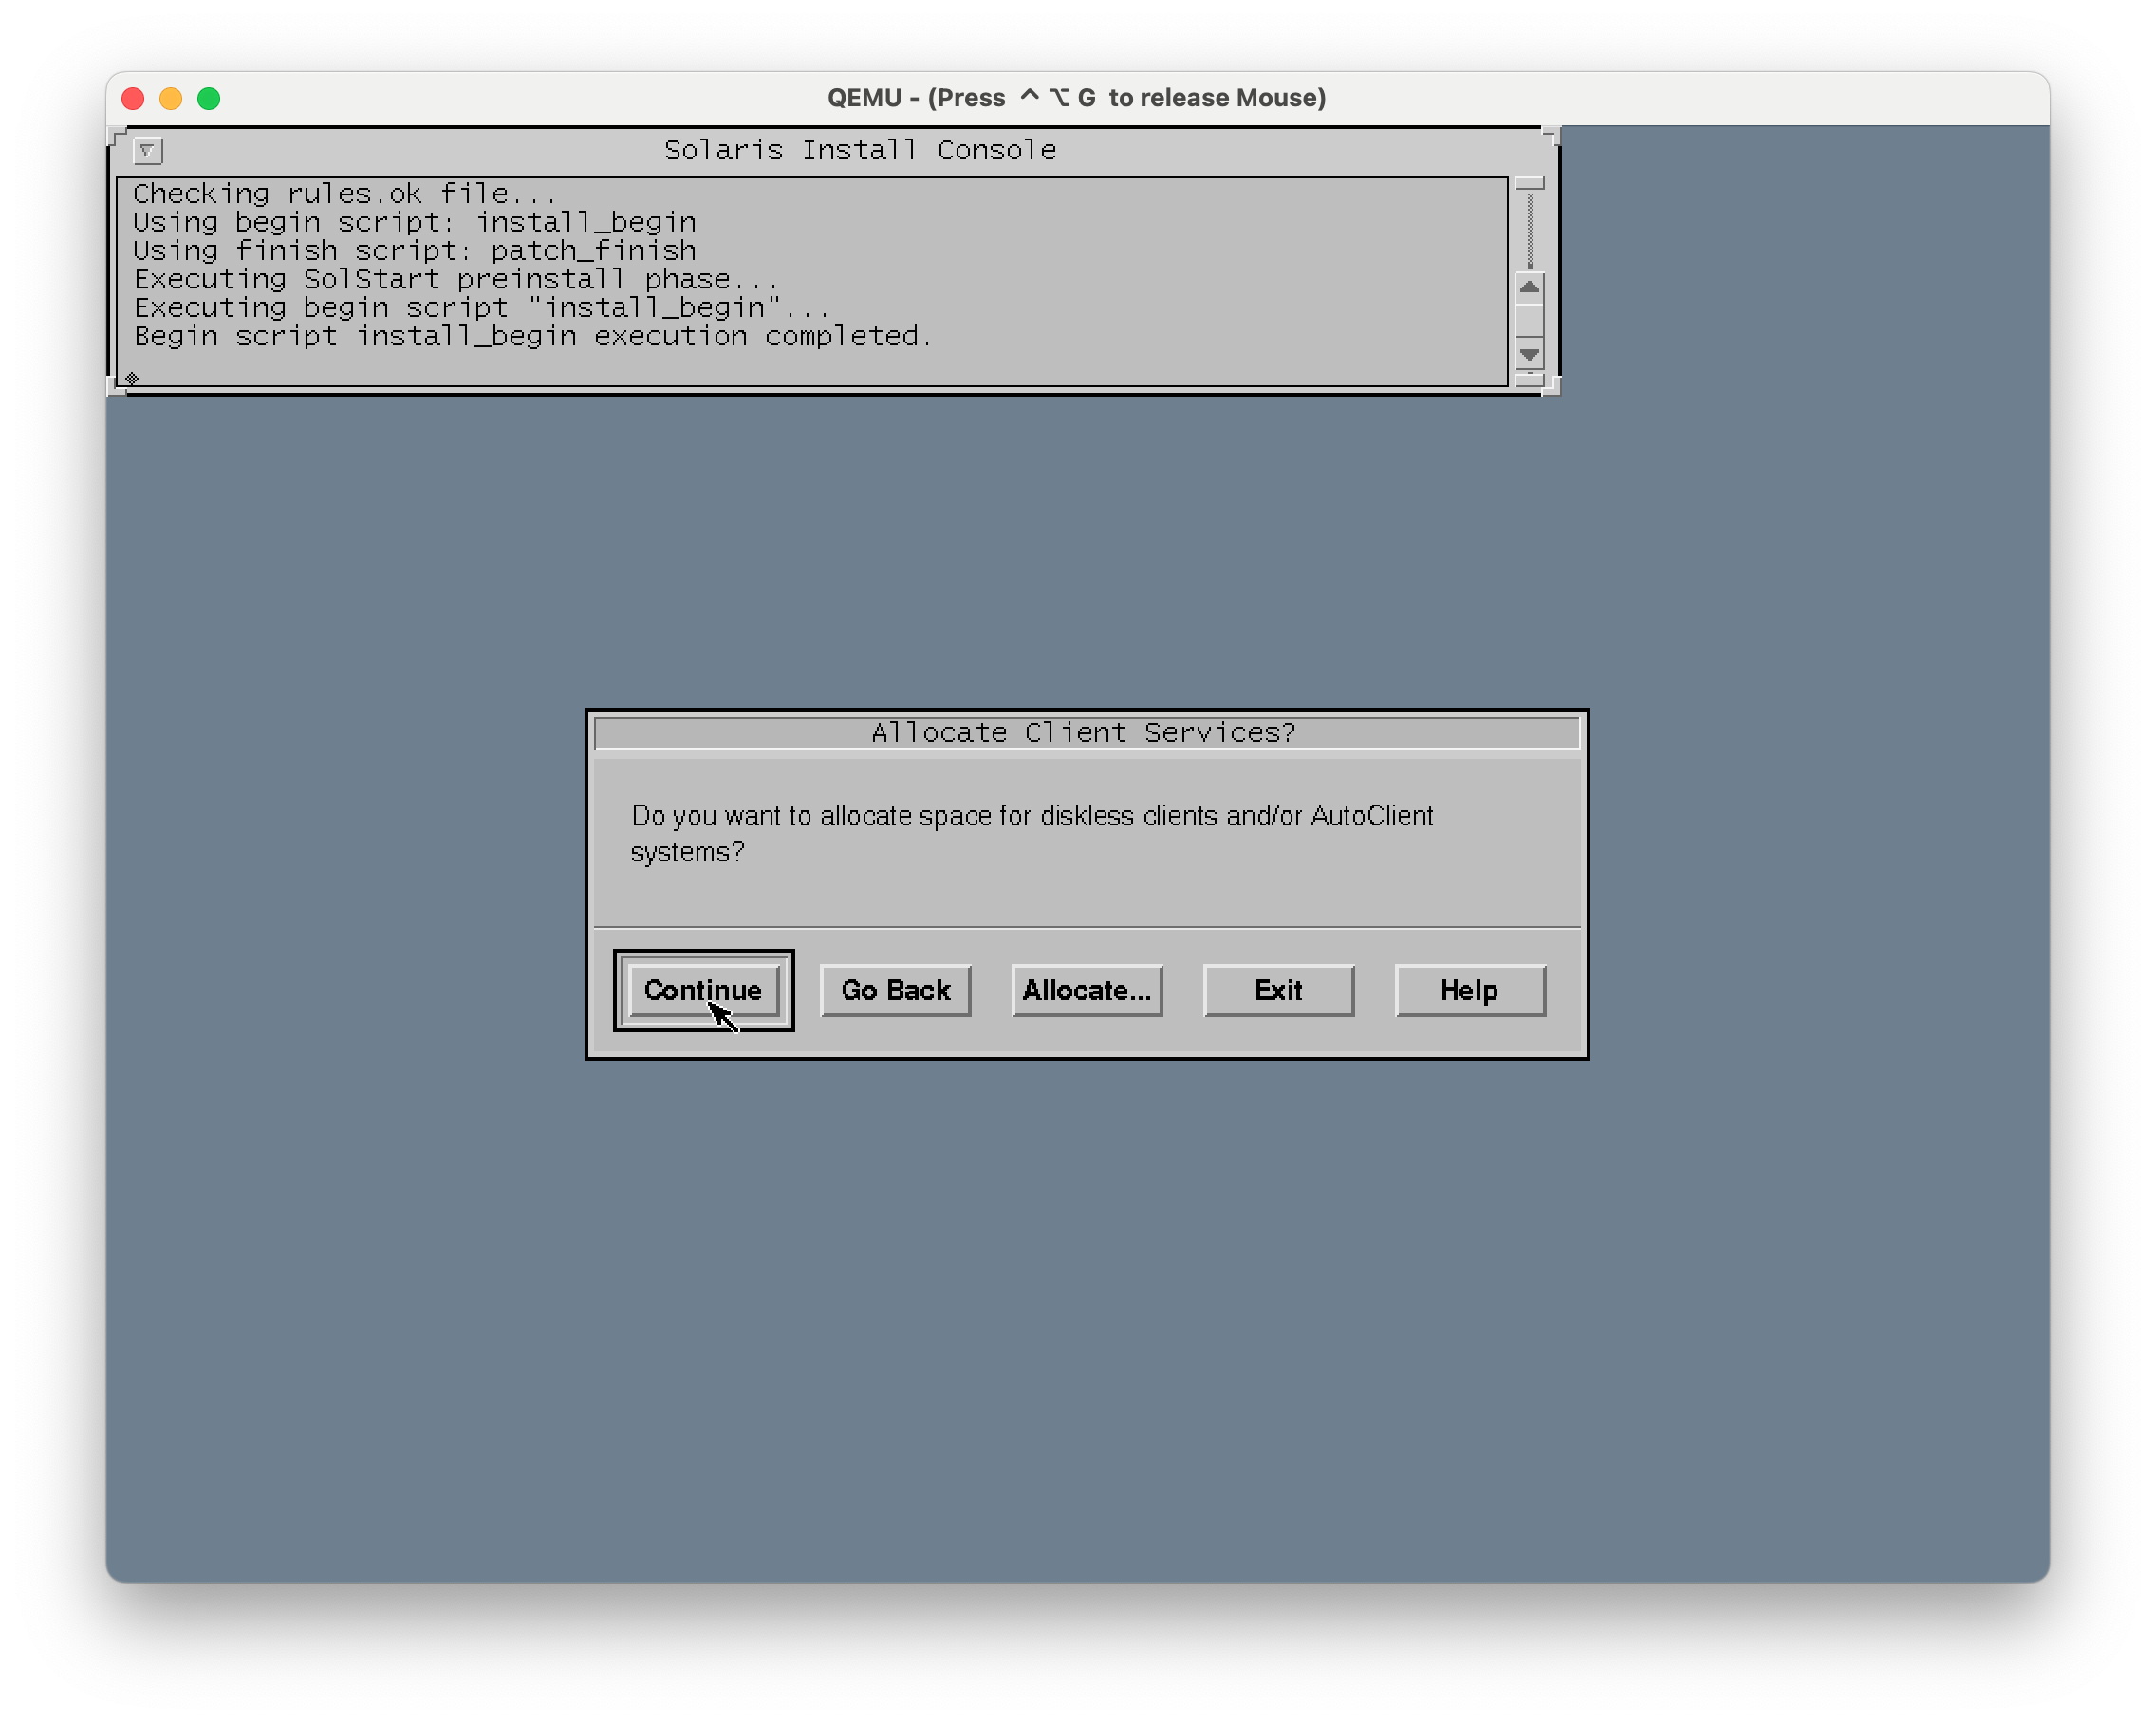
The installer ask us if we want to allocate space for diskless clients. Select continue: we don't want that.
The installer now lets us configure extra languages. Choose any extra you like, but I didn't bother. The list doesn't contain any interesting language for me anyway.

Next, the installer asks us what kind of distribution we want to install. I recommend to install 'Entire Distribution'. We have the disk space. I think that OEM support is a waste. I don't really know what it means, but nobody is going to give us any support anyway. ;)

Now the installer asks us on which device we want to install. There is only one harddisk, and it's already selected, so we can Continue.

The installer gives us a chance to preserve existing data. There is none, so Continue.

Now the installer arrives at a crucial step. This is where we are asked if we want to automatically layout the file system. And we don't want that for even one second!
So, we take care to select 'Manual Layout'.

The installer show us a preview of what it currently wants to create. Here, we want to select Customize, so that we can manually enter the partitions and sizes.

Credits go to Brezular again, although I did tweak his numbers a little to have less unused disk space.
I also named the largest partition /usr/local, as that is what most software packages expect to be installed in.
Delete anything that is prefilled here, we don't want any of it. Instead we will enter these parameters for each corresponding slot:
0 / 1780
1 /var 4280
2 /opt 4280
3 swap 4096
4
5
6 /usr 5280
7 /usr/local 15000

We will receive a warning that there is still unused disk space. It's only 9MB, and let's not push our luck and risk problems because of rounding errors. So just select Ok to continue.


The installer will bother us with another warning that there is still unused disk space. We ignore it and select Ok.
Now we are at another point where we want to differentiate from the default installation choice. The installer will ask us if we want to auto reboot after installation. And NO, we do not want to automatically reboot.
After installing, we want to finalize the setup for the network. So we select 'Manual Reboot'.

The installer will create the partitions and start copying files. A proper '90's system administrator will now go for a cup of coffee and a chat (and a cigarette? ;)). But actually it only takes a few minutes with QEMU. Too short to make a Greek coffee, as is my particular liking. ;)

When the installation is finished, the installer will tell us so in the Solaris Install Console at the top left of the screen. This window is not just informative, but is a proper shell (/bin/sh) with a prompt (#). And in it we will finalize the installation. The console can be resized to make it easier to see the results of the extra steps.

First thing to do is to set our default gateway (or 'default router' in Solaris terms) to 10.0.2.2. We select the Solaris Install Console and type the following (the # is the prompt, we don't type that):
# cd /a/etc
# echo "10.0.2.2" > defaultrouter

Now we need to enable the DNS services. This is a bit of a complex line, but it basically adds the entry ' dns' to the line 'host: files' in nsswitch.conf, making a backup of the original, just in case.
# sed 's/hosts:.*files/hosts: files dns/g' nsswitch.conf > nsswitch.conf.new
# mv nsswitch.conf nsswitch.conf.old && mv nsswitch.conf.new nsswitch.conf
# chmod 644 nsswitch.conf
Alternatively, if you know how to use vi, you can just open the existing nsswitch.conf file, find the line that says 'hosts: files', and add a space or tab character and the text ' dns' after it, like so:
hosts: files dnsNext up is to set our DNS to 10.0.2.3.
# echo "10.0.2.3" > resolv.conf

And that's it! We can now reboot.

During the very first boot, before being able to log in and use the system, we are asked to provide a password for the root user. Enter something and don't forget it afterwards.

The system will reboot automatically after entering the root password, and after a while we are presented with the login screen. Enter the username root and the password that you gave. The system will then give us one final question: do we want to use Common Desktop Environment or OpenWindows Desktop. Naturally we want the CDE. OpenWindows is older, and CDE is a huge improvement in my opinion.


In part three, we will be installing a few packages that I think are indispensible. One is SSH, enabling us to copy files from and to the emulated system (using 'scp'). Another is GCC, which is necessary because Sun stopped packing a C compiler with the system, so Solaris 2.6 does not have a compiler.


I have followed several tutorials on running Solaris on QEMU, and I have managed to set up OS and desktop, and install software packages from CD images. While setting up the guest OS to reach the host Windows machine, I have hit a wall getting the guest to talk to the host via a network tap on the host machine. I am looking to push or pull files from the guest via wget or something similar, onto the host once I finish converting some old documents to PDF.
ReplyDelete